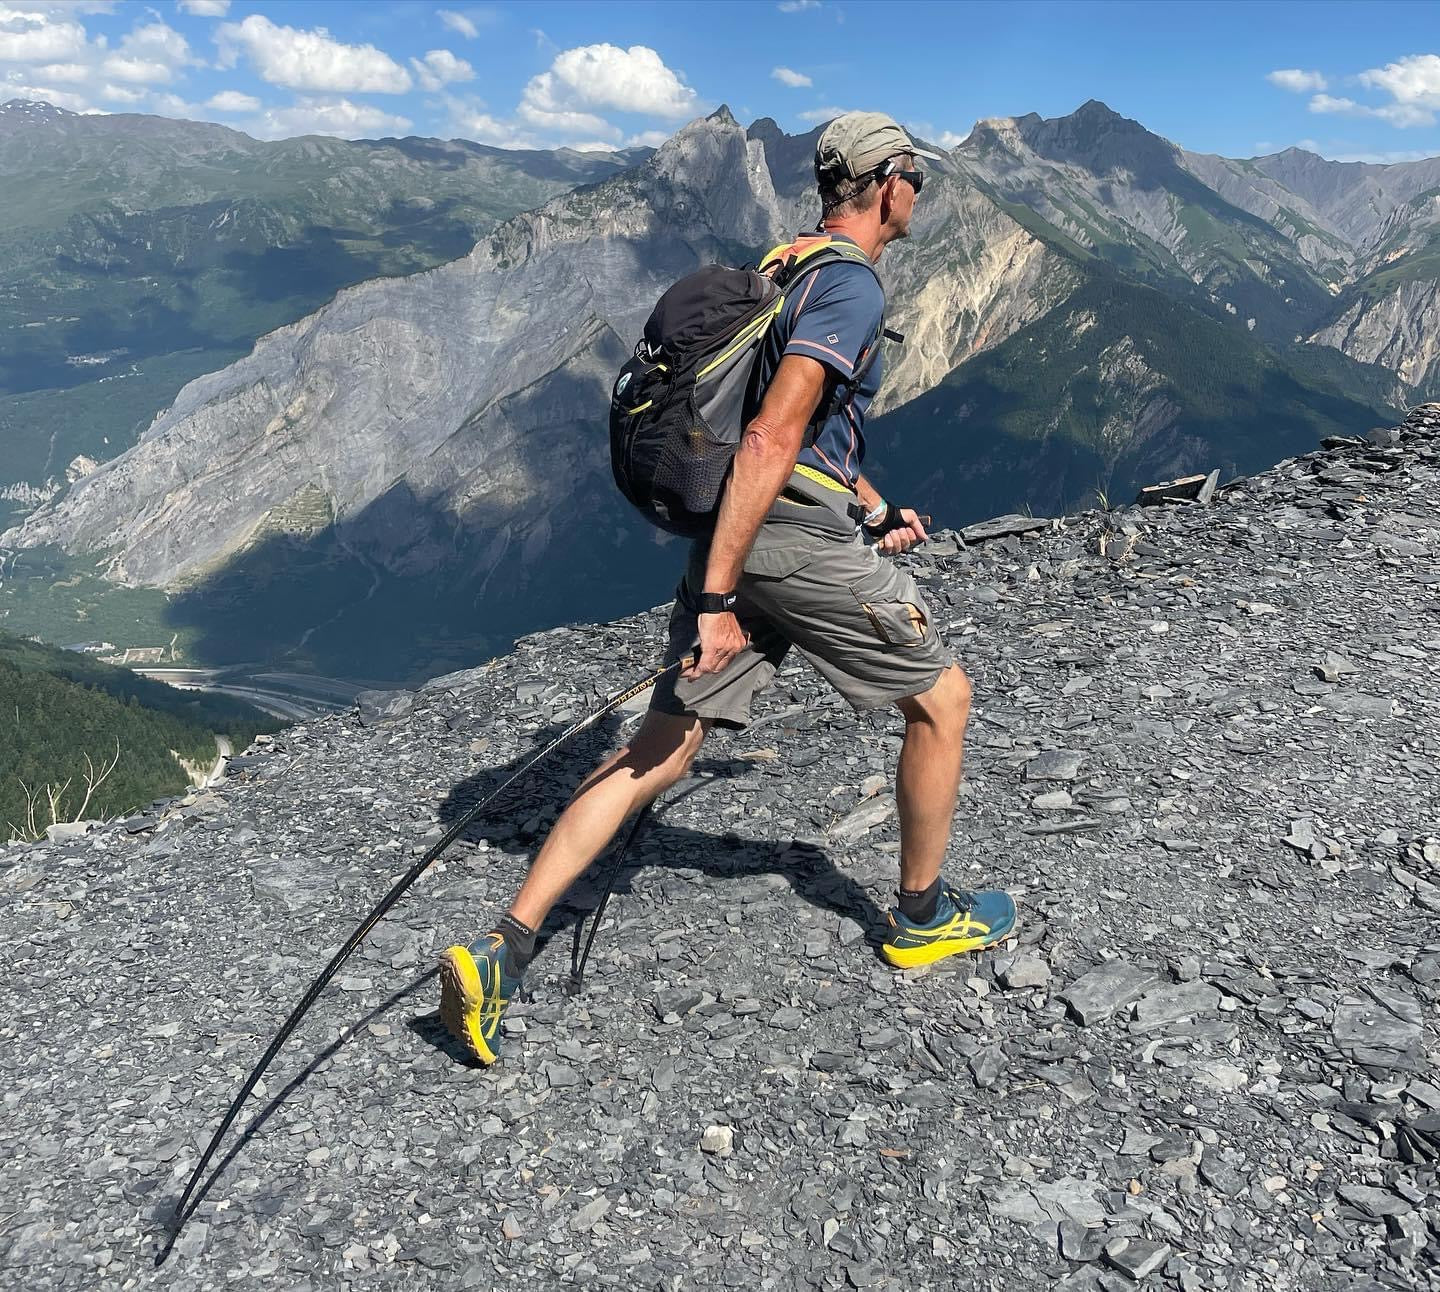
How to Improve Your Nordic Walking Technique: 7 Exercises
To improve your Nordic walking technique, work on one point at a time, with short exercises slipped into your usual outings. The federations agree on the essentials: arms and legs in sync, the pole planted at a backward angle, a push that carries on past the hip, a hand that opens, and a trunk that follows the movement. Here are 7 exercises to get there, each with its aim, instructions, dose and the mistake to avoid.
In short
- The 5 criteria to aim for are the ones the French athletics federation assesses: arm-leg synchronisation, the pole plant, posture, forward arm range and backward arm range.
- Work on one point per outing. Do 1 or 2 exercises of 5 to 10 minutes after the warm-up, then carry on walking while keeping the feeling.
- The costliest mistake is to plant the pole in front of the foot and stop the push at the hip. The hand should finish the push behind the hip.
- Technique really changes the effort. In instructors, stiff arms or an elbow-driven movement made the push 11 to 17% less effective (Pellegrini et al., 2018).
- To progress quickly, get filmed from the side and corrected by an instructor, in a club or on a course.
What the federations expect from good technique
Teaching methods differ in the details, but they all describe the same movement. To enter its coach training, the French athletics federation (FFA) assesses candidates' technique on five criteria: arm-leg synchronisation, the pole plant, posture, forward arm range and backward arm range. The French hiking federation (FFRandonnée) sums up basic technique in three movements, “SAP”: arm-leg synchronisation, lengthening the stride and propelling the body forwards. The international federation INWA also states in its 2026 competition rules that the hand ends the push behind the hip.
| Technical point | What to aim for | Exercise |
|---|---|---|
| Synchronisation | The opposite arm and leg move forward together, as when you walk without poles. | 1 |
| Pole plant | Tip angled backwards, planted between the two feet, slightly behind the front foot. | 2 |
| Forward range | Arm extended “as if to shake hands”, elbow away from the body, hand at navel height. | 2 and 6 |
| Backward range | Push until the hand passes the hip, elbow straight, shoulder low, hand open. | 3 and 4 |
| Posture and rotation | Upright without stiffness, trunk leaning slightly forward, eyes ahead; the shoulders follow the arms, the pelvis follows the legs. | 5 and 7 |
The quality of the movement changes what you get from every outing. An Italian team had ten instructors walk on a treadmill at 5.5 km/h, using the recommended technique and then deliberately altering it (Pellegrini et al., 2018). With good technique, oxygen uptake was 37% higher than walking without poles, and the lats, triceps and rear shoulders worked hardest. When they pushed weakly, with stiff arms or mainly from the elbow, their oxygen uptake fell by about 12% and the activity of those muscles dropped sharply. Another study by the same team measured upper-body activity 2 to 15 times higher than in ordinary walking (Pellegrini et al., 2015).

7 exercises to improve your technique
Do them after a 10-minute walking warm-up, on a flat, clear path. Choose one or two exercises per outing, no more, because technique improves best when your attention is on a single point. Between repetitions, go back to your normal walking while keeping the feeling. First check the length of your poles. It equals your height multiplied by 0.68; between two lengths, take the shorter one (details in our article What size Nordic walking poles should you choose?).

1. Find your synchronisation again with trailing poles
- Aim: restore the natural opposition of arms and legs, and correct ambling (arm and leg on the same side moving together), the most common beginner's mistake.
- How: with your straps well adjusted, open your hands and let the poles trail behind you. Walk normally and let your arms swing on their own, in opposition to your legs. Then close your hands on the grips without changing rhythm, and start pushing gently.
- Dose: 2 to 3 times 1 minute at the start of the outing. This is the correction the FFA recommends for ambling.
- Mistake to avoid: looking at your poles. Keep your eyes ahead and let the rhythm come from your legs.
2. Plant the pole between your feet
- Aim: plant the tip in the right place, angled backwards.
- How: bring the arm forward, extended as if to shake hands, elbow away from the body. Plant the tip between your feet, slightly behind the front foot, never in front. To watch yourself better, walk with a single pole, the other arm swinging freely, and switch sides every minute.
- Dose: 4 times 1 minute, alternating sides.
- Mistake to avoid: planting the pole in front of the foot, almost vertical. It brakes your momentum instead of pushing you, and the support puts more load on the wrist and shoulder.
3. Push past the hip
- Aim: lengthen the push phase, the one that propels you.
- How: after the plant, push on the pole by extending your arm backwards until your hand clearly passes the hip. The elbow straightens, the shoulder stays low and relaxed. As a cue, your hand passes behind your buttock.
- Dose: 5 times 1 minute of firm pushing, with 1 minute of normal walking in between.
- Mistake to avoid: shrugging your shoulders or stopping your hand beside the hip. For INWA, a hand that stops alongside the body means an incomplete push, and a rising shoulder sends the force upwards instead of into the pole.
4. Open your hand at the end of the push
- Aim: relax the hand at the end of the push to extend the arm further back, without tension.
- How: grip the handle as you plant the pole, then open your hand fully as it passes the hip. The strap then holds the pole and transmits the end of the push. Close your hand on the grip as the arm swings forward. Over 50 metres, exaggerate the opening, fingers spread wide.
- Dose: 3 times 50 metres exaggerating, then 2 minutes with your normal movement.
- Mistake to avoid: keeping the grip clenched all the way. The forearm then tenses and the arm no longer reaches as far back. To open your hand safely you need straps that fit (see our article Nordic walking straps: role, sizes and how to choose them well).
5. Get your core working with trunk rotation
- Aim: let the shoulders follow the arms and the pelvis follow the legs. This separation of shoulder and hip movement makes the action fluid and brings the trunk into play.
- How: standing still, rest the poles on your shoulders, held with both hands, and slowly turn your trunk from right to left, pelvis facing forwards. Then walk, letting the shoulder come forward with the front arm.
- Dose: 10 rotations each side, then 3 times 1 minute while walking.
- Mistake to avoid: a locked trunk where only the arms move, or, the opposite, shoulders bobbing up and down. The line of the shoulders stays level.
6. Lengthen your step with slow, long strides
- Aim: link the range of the arm with that of the step. Trainers at the French federation FSGT sum it up by saying that the range of the hand drives the length of the step.
- How: walk slowly, arms fully extended in front and behind, with long steps rolling from heel to toe, without jerks. Then, at your usual pace, count your steps over 100 metres; repeat, trying to take a few fewer thanks to a longer push, without slowing down.
- Dose: 2 times 100 metres slowly, then 3 times 100 metres counting.
- Mistake to avoid: throwing the leg far forward with a straight knee. The step lengthens through the push of the arm and the back foot, not by reaching with the front leg.
7. Feel the power of both arms with double poling
- Aim: feel a firm, symmetrical push. Double poling is one of the technical tests judged at the FSGT federal events.
- How: plant both poles at the same time, between your feet, and push with both arms until past your hips, hands open, while your legs keep walking. Bring both arms forward together and plant again every two or three steps, without stopping.
- Dose: 4 times 30 seconds, with 1 minute of normal walking in between.
- Mistake to avoid: diving with your trunk and rounding your back to push. The body leans forward in one piece, without bending at the lower back.
Common mistakes, and how to correct them
Six faults come up in almost every group. Most come from a shortened movement, in which the pole goes along with the walk instead of propelling it.

| Mistake | What you lose | Exercise |
|---|---|---|
| Pole planted in front of the foot | The pole brakes instead of pushing, and the support loads the wrist and shoulder. | 2 |
| Stiff arms, everything from the shoulder | A push 11% less effective and energy use down 12% (Pellegrini et al., 2018). | 3 |
| “Elbow” action, pole almost vertical | A push 17% less effective and propulsive force down by a third (Pellegrini et al., 2018). | 3 |
| Hand that never opens | An arm that stops at the hip and a tense forearm. | 4 |
| Locked trunk | A stiff movement in which only the arms work. | 5 |
| Ambling | A broken rhythm and a push that is hard to place. | 1 |
In competition, the most debated fault is of the same kind. At high speed, the push tends to get shorter. INWA has clarified its rules for 2026 to require active use of both poles, with the hand finishing behind the hip. We discuss this in our article Competitive Nordic walking: what if we talked again about the push on the poles?
Can equipment help your technique?
Equipment does not replace technique, but it can hinder or help it. Three things matter: poles of the right length, straps that fit your hand so you can open it without losing the pole, and tips in good condition for a firm grip on the ground.
The MØNARC® Arcs de Marche® go further by working on the very shape of the pole. The movement remains that of Nordic walking, compatible with every teaching method. But their full-length curve follows the natural path of the arm and directs the push forwards. The Université Grenoble Alpes measured, in eight regular walkers at 5 and 6 km/h, a push angle of 33° instead of 46° with straight poles and 22% more effective propulsion, with no rise in oxygen uptake or heart rate. The upper body (biceps, triceps, deltoids, lats) tends to work harder, which is the very aim of the technique. The study involved eight people, and the researchers call for larger studies.

Allow a few outings to find your rhythm. Once the push is in place, our walkers often describe a “booster effect”. Read the Université Grenoble Alpes study.
A simple 4-week plan
With two or three outings a week, this plan covers all seven exercises in a month. Each session starts with a 10-minute warm-up, continues with 10 to 15 minutes of exercises and ends with your normal movement.
| Week | Exercises | What you work on |
|---|---|---|
| 1 | 1 and 2 | Synchronisation and pole plant |
| 2 | 3 and 4 | Push and hand opening |
| 3 | 5 and 6 | Trunk rotation and range |
| 4 | 7, then your two weak points | Push power and a video check |
After that, our 8-week Nordic walking training programme helps you build endurance and pace.
Getting corrected on video, in a club or on a course
Technique is hard to feel from the inside. Get filmed over 20 metres of flat path, from the side and then from behind, at your usual pace. In slow motion, check five points: arms and legs in opposition, tip planted between the feet and angled backwards, hand passing the hip and opening, shoulders low, trunk rotating without bobbing.
An instructor spots in a few minutes what would take you weeks to feel. If you are a beginner, first go over the basic Nordic walking technique, then join a club. To go further, the MØNARC® certification courses (in French) bring clubs and coaches together for two days in the field, with Nathalie Gilbert, Nordic walking instructor, or Jean-Pierre Guilloteau, state-qualified mountain leader. Participants work on correcting the movement and getting to grips with curved poles, and leave with exercises to reuse in sessions.
If you run a club, a coach trained on these courses enables it to become a MØNARC® Partner Club. The label gives its members €30 off each pair of Arcs and the club preferential terms on the courses. What the training changes for an instructor is explained in our article Nordic walking coach: what the MØNARC® approval changes.
Frequently asked questions
How long does it take to improve your Nordic walking technique?
The basics come in a few supervised sessions. A full push, with the hand open behind the hip, usually takes several weeks of regular practice. Working on one point per outing and filming yourself once a month helps you progress faster.
Where should you plant your pole in Nordic walking?
Plant it between your two feet, slightly behind the front foot, with the tip angled backwards. A pole planted in front of the foot brakes your progress instead of propelling you.
Should you let go of the pole completely?
The hand opens fully as it passes the hip, and the strap holds the pole during the end of the push. It closes on the grip again as the arm swings forward.
Can shoulder or wrist pain after an outing come from your technique?
It may, because a clenched hand and rising shoulders tense the upper body. Exercises 3 and 4 help you relax. Also check the length of your poles. If the pain persists, see a doctor.
Do you need to change your technique with curved poles?
With the Arcs de Marche®, the movement remains that of Nordic walking and the seven exercises apply as they are. Allow a few outings to find your rhythm. They are accepted in competition on all circuits in Europe.
Sources
- Fédération française d'athlétisme, “Tests d'entrée, formation 1er degré entraîneur marche nordique”, 2016.
- Fédération française d'athlétisme, “La marche nordique : conseils”, athle.fr, accessed October 2026.
- FFRandonnée, “Les cahiers de marche nordique : la technique de base et l'initiation”, accessed October 2026.
- INWA, “Fair Play and Active use of a pair of Nordic walking poles during competitions”, 2026 competition rules (rules 3.4 and 3.9).
- FSGT, Nordic walking group, “Formation des juges arbitres experts fédéraux marche nordique 2026”, 2025.
- CHU UCL Namur, “Étapes techniques de la marche nordique et divers exercices”, 2023.
- Pellegrini B. et al., “Muscular and metabolic responses to different Nordic walking techniques, when style matters”, PLoS One, 2018, 13(4): e0195438.
- Pellegrini B. et al., “Exploring muscle activation during Nordic walking: a comparison between conventional and uphill walking”, PLoS One, 2015, 10(9): e0138906.
- Termoz N., Depery E., Lorenzi G., Université Grenoble Alpes: comparison of straight poles and MØNARC® curved poles in 8 regular walkers, at 5 and 6 km/h.

The MØNARC® Arcs de Marche®
These curved 100% carbon Nordic walking poles weigh 140 g each and are designed and assembled in France. They are delivered ready to walk with straps, tungsten carbide tips and a made-to-measure bag.
Disclaimer. This article provides general information. It does not replace the advice of a doctor or health professional, nor supervision by a qualified instructor. Before starting or stepping up physical activity, especially if you have a health condition, pain or ongoing treatment, consult your doctor. Exercise according to your fitness, on suitable ground and with equipment in good condition. Each reader remains solely responsible for their own practice and for the decisions they make based on this information, and MONARC SAS cannot be held liable for their consequences.